FreeCAD-manual
An experiment at reorganizing the contents of the FreeCAD wiki in an easier, friendlier book-like manner. The manual is now hosted on the FreeCAD wiki
Creating renderings
In computer talk, a rendering is a word used to describe a nice image produced from a 3D model. Of course, we could say that what se see in the FreeCAD 3D view is already nice. But anybody who saw a recent Hollywood movie knows that it is possible to produce images with a computer that are almost undistinguishable from a photograph.
Of course, producing such photo-realistic images requires a lot of work, and a 3D application that offers specific tools for that, such as precise controls for materials and lighting. FreeCAD being an application more geared towards technical modeling, it doesn’t feature any advanced rendering tool.
Fortunately, the opens-source world offers many applications to produce realistic images. Probably the most famous one is Blender, which is very popular and widely used in the movies and gaming industries. 3D models can very easily and faithfully be exported from FreeCAD and imported into Blender, where you can add realistic materials and illumination, and produce the final images or even animations.
Some other open-source rendering tools are made to be used inside another application, and will take care of doing the complex calculations to produce realistic images. Through its Raytracing Workbench, FreeCAD can use two of these rendering tools: POV-Ray and Luxrender. POV-Ray is a very old project, and is considered a classical raytracing engine, while Luxrender is much newer, and is categorized as an unbiased renderer. Both have their strengths and weaknesses, depending on the type of image one wants to render. The best way to know is to look at examples on both engines websites.
Installation
Before being able to use the Raytracing Workbench in FreeCAD, one of these two rendering applications needs to be installed on your system. This is usually very straightforward, both provide installers for many platforms or are usually included in the software repositories of most Linux distributions.
Once POV-Ray or Luxrender is installed, we need to set the path to their main executable in the FreeCAD preferences. This is usually only required on Windows and Mac. On Linux FreeCAD will pick it from the standard locations. The location of the povray or luxrender executables can be found by simply searching your system for files named povray (or povray.exe on Windows) and luxrender (or luxrender.exe on Windows).
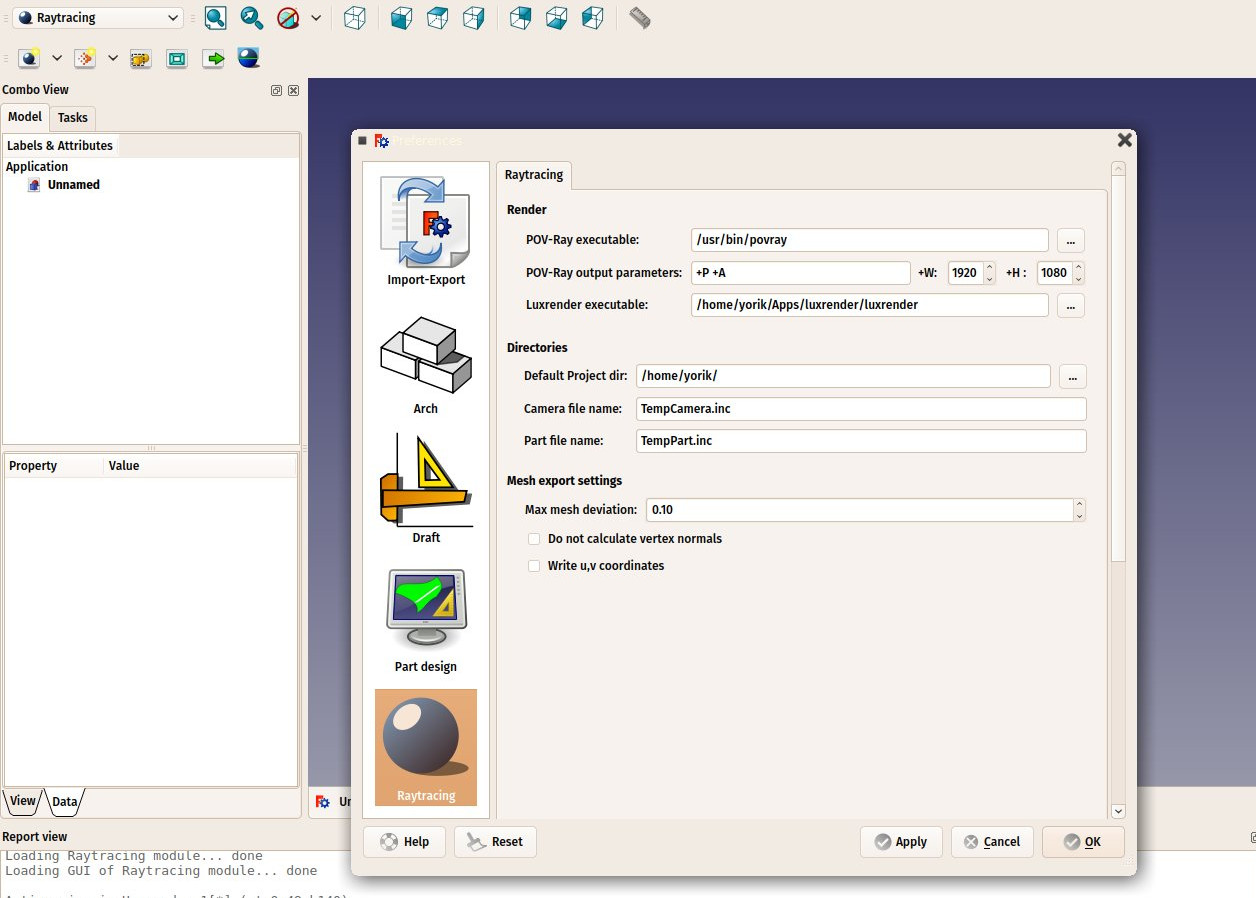
In this preferences screen we can also set the desired image size we want to produce.
Rendering with PovRay
We will use the table we have been modeling in the tradtional modeling chapter to produce renderings with PovRay and Luxrender.
- Start by loading the table.FCStd file that we modeled earlier or from the link at the bottom of this chapter.
- Press the small down arrow next to the
 New Povray project button, and choose the RadiosityNormal template
 - A warning message might appear telling you that the current 3D view is not in perspective mode and the rendering will therefore differ. Correct this by choosing No, choosing menu View→Perspective view and choosing the RadiosityNormal template again.
- You might also try other templates after you created a new project, simply by editing its Template property.
- A new project has now been created:
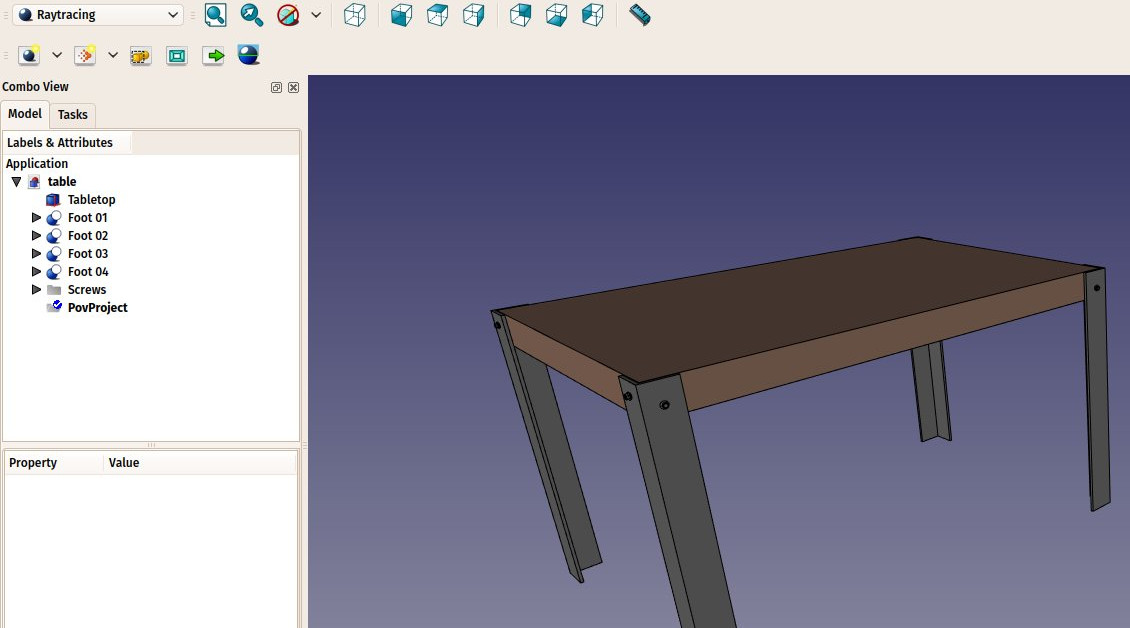
- The new project has adopted the point of view of the 3D view as it was at the moment we pressed the button. We can change the view, and update the view position stored in the povray project anytime, by pressing the
 Reset camera button.
 - The Raytracing Workbench works the same way as the Drawing Workbench: Once a project folder is created, we must add Views of our objects to it. We can now do that by selecting all the objects that compose the table, and press the
 Insert part button:
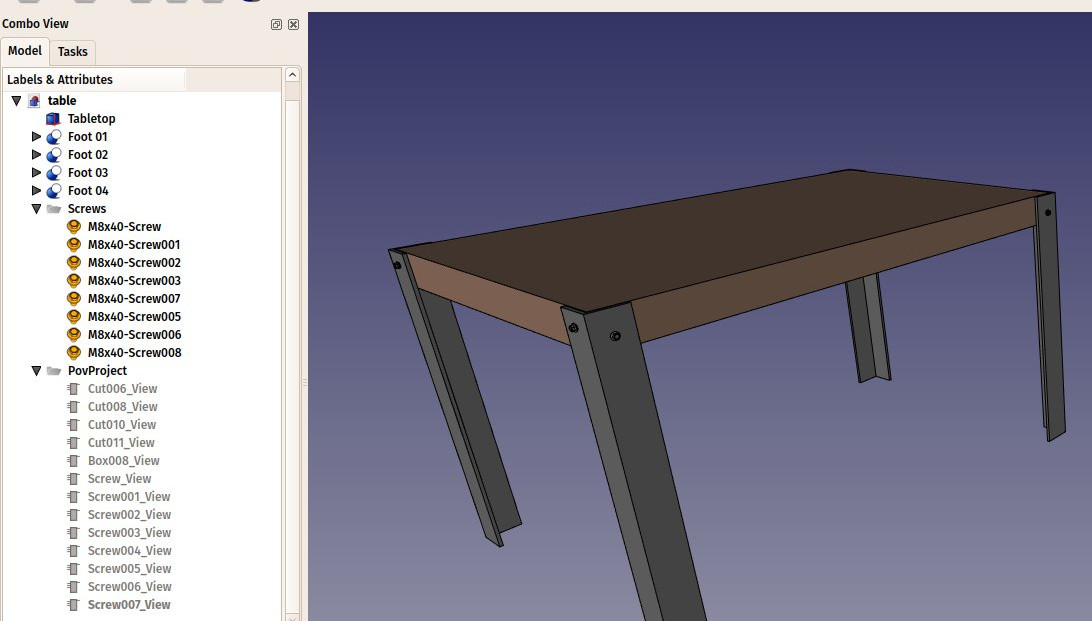
- The views have taken the color and transparency values from their original parts, but you can change that in the properties of each individual view if you wish.
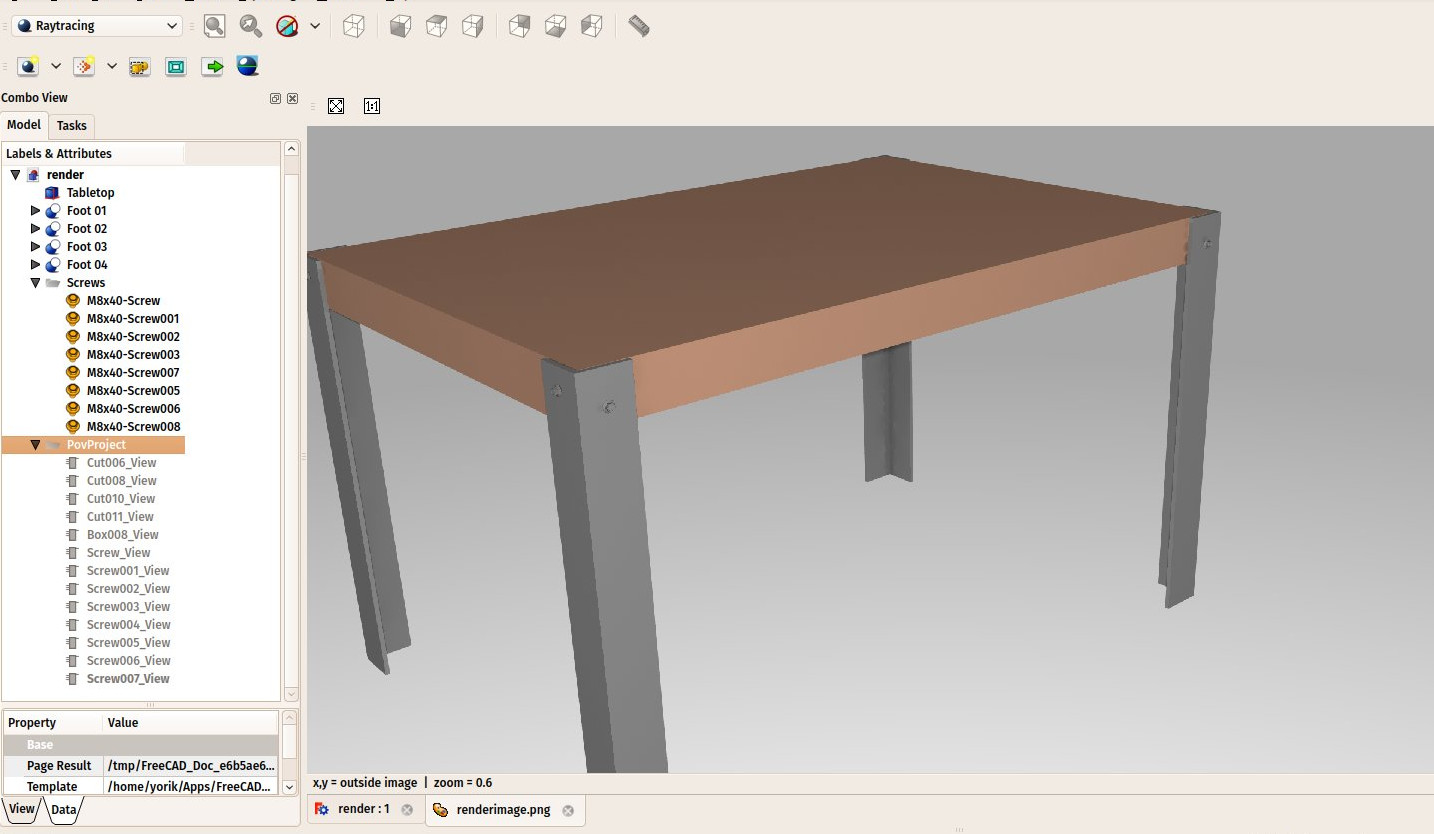
- We are now ready to produce our first povray render. Press the
 Render button.
 - You will be asked to give a file name and path for the .png image that will be saved by povray.
- The povray will then open and calculate the image.
- When this is done, simply click the image to close the povray window. The resulting image will be loaded in FreeCAD:
Rendering with LuxRender
- Rendering with Luxrender works almost the same way. We can leave our file open and create a new Luxrender project in the same file, or reload it to start from scratch.
- Press the little down arrow next to the
 New Luxrender project button and choose the LuxOutdoor template.
 - Select all the components of the table. If you still have the povray project in your document, be sure to also select the lux project itself, so the views created in the next step won’t go in the wrong project by mistake.
- Press the Insert part button.
- Select the luxrender project, and press the Render button.
- Luxrender works differently than povray. When you start the render, the luxrender application will open and immediately start rendering:

- If you leave that window open,Luxrender will continue calculating and rendering forever, progressively refining the image. It is up to you to decide when the image has reach a sufficient quality for your needs, and stop the render.
- There are also many controls to play with, on the left panel. All these controls will change the aspect of the image being rendered on the fly, without stopping the rendering.
- When you feel the quality is good enough, simply press Render→stop, and then File→Export to image→Tonemapped low dynamic range to save the rendered image to a png file.
You can extend greatly the render possibilities of FreeCAD by creating new templates for povray or luxrender. This is explained in the Raytracing Workbench documentation.
Downloads
- The table model: https://github.com/yorikvanhavre/FreeCAD-manual/blob/master/files/table.FCStd
- The file produced during this exercise: https://github.com/yorikvanhavre/FreeCAD-manual/blob/master/files/render.FCStd
Read more
- The Raytracing Workbench: https://wiki.freecad.org/index.php?title=Raytracing_Module
- Blender: http://www.blender.org
- POV-Ray: http://www.povray.org
- Luxrender: http://www.luxrender.net